Posted on Leave a comment

New Lampwork Beads

Here are some new lampwork beads I have recently made.  They will make some fun new jewelry pieces.  Sign up for my email list to get advance notice of upcoming new jewelry releases and advanced sales.

#artstudio #newartstudio #florida #floridaartist #floridalife #art #artist #awesome #christinamlee #christinamleedesigns #leeshorestudio #followme #picoftheday #instalike #instagood #lampworkbeadartist #fiberartist #jewerlydesignartist #lampwork #lampworkbeads #artstudio #beads #blog

Posted on Leave a comment

Classes I teach: Lampwork Bead Making

LAMPWORK BEAD MAKING:

This class I teach you how to make your own handmade lampwork or flamework glass beads.  Glass rods are melted under an open torch and formed into glass beads.  You will learn about expansion of glass, about compatible glasses, how to anneal your beads, and much more.  $100.00 includes all supplies and use of all tools (you take home your finished beads).  This is a one secession class, 5 hours long.  The class is limited to two students.

Classes are available by appointment only:

Due to limited space available for teaching, my Classes are limited to 1, 2 or 3 students per class depending on the class.  This makes my classes very individualized providing you the one-on-one instruction that you will not receive in a larger class setting.  This also allows me to be flexible in my teaching schedule.

Classes are generally weekday evenings, or Saturday during the day or evenings.  I can also work with you to fit your class around your schedule.  I can arrange a weekday afternoon class if that is the only time you have available.  I thoroughly love teaching, so click here to see a list of other classes I teach: http://creationsbychristina.net/?page_id=913

Follow my blog via email.  Be among the first to receive my blog posts and to know about specials and sales, click the ‘subscribe’ button in the right hand column.


Posted on Leave a comment

Wine Bottle Cozy

Here is the wine bottle cozy I crocheted for my Mother-in-Law for her birthday.  She loved it.

The Yarn was Red Heart Collage and the color is Landscape Green.

I just love how the greens and pink of the yarn were blended and came out so pretty.

I added the ruffled rows around the top to make it more ruffly after the draw string is pulled.

The two beads on the draw string are two of my lampwork (handmade) glass beads.


Here is the pattern I used: http://www.yarntomato.com/patterns/wine-bottle-cozy/

I made a few changes. I skipped rows 12 and 13, (the two rows where you add the beads) because I was not adding beads.  I did 6 rows of sc after changing from the bottle bottom and starting up the sides, but that was going too slow, so I changed to dc and crocheted to 9 inches from bottom.  Then switched back to sc for the last 1/2 inch.  For the top edge, after I finished the pattern, I wanted it more ruffly than the pattern called for, so I did one row of sc working 3 sc in each stitch to force it to ruffle and then another row of sc working 2 sc in each stitch, continuing to force it to ruffle.

Then made my draw string and added two of my handmade (lampwork) beads to the ends of the drawstring after I threaded it into the cozy.

Happy crocheting.

To follow my blog, click on the purple diamond on the right hand side of the screen below the links section–>

Posted on Leave a comment

Learn how to make glass beads

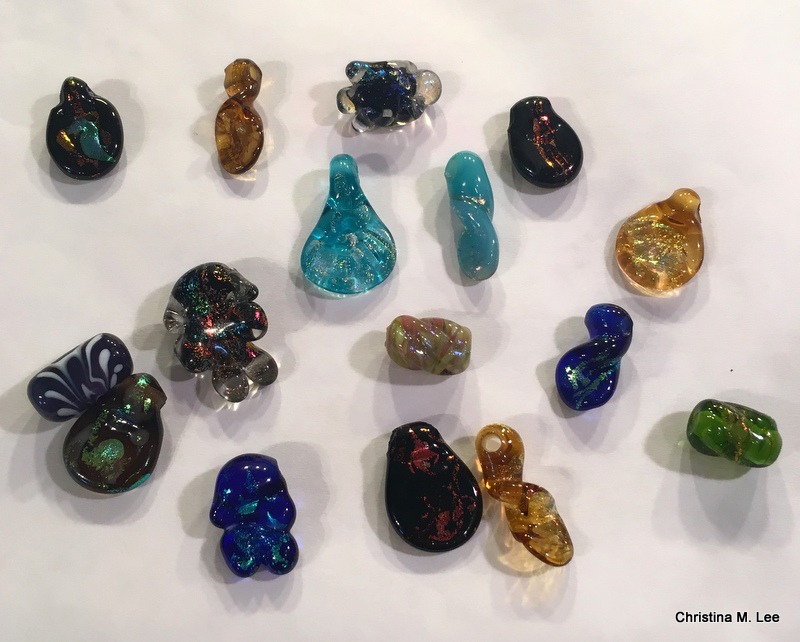
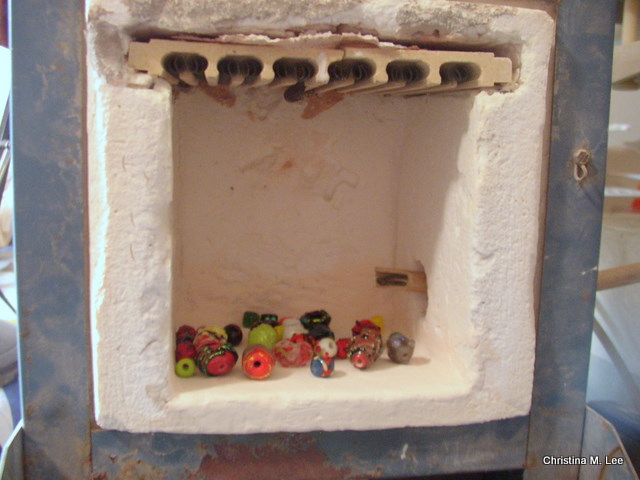
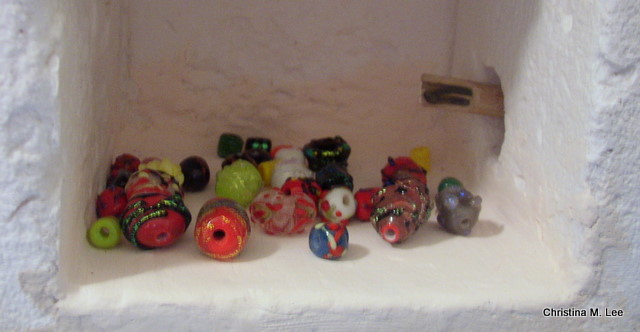
Glass bead making, under an open torch, Lampwork.

In my next few blog posts, I thought I would remind you of the classes I teach.


LAMPWORK BEAD MAKING: This class teaches you how to make your own handmade lampwork or flamework glass beads.  Glass rods are melted under an open torch and formed into glass beads.  You will learn about expansion of glass, compatible glasses, how to anneal your beads, and much more.  $100.00 includes all supplies and use of all tools (you take home your finished beads).  This is a one secession class, 5 hours long.  The class is limited to three students.

Classes are available by appointment only:

Due to limited space available for teaching, my Classes are limited to 1, 2 or 3 students per class depending on the class.  This makes my classes very individualized providing you the one-on-one instruction that you will not receive in a larger class setting.  This also allows me to be flexible in my teaching schedule.

Classes are generally weekday evenings, or Saturday during the day or evenings.  I can also work with you to fit your class around your schedule.  I can arrange a weekday afternoon class if that is the only time you have available.  I thoroughly love teaching, so click here to see a list of other classes I teach: http://creationsbychristina.net/?page_id=913


To follow my blog, click on the purple diamond at the bottom of the links section on the right hand side of the page ———>


Posted on Leave a comment

Upcoming Blogs

In the next few weeks I will post some blogs about free form design, i.e. designing a necklace or bracelet when you have not drawn out a sketch in advance.  As in the pic below.

This is a carved bone pendant, strung abstractly with 6 of my handmade glass beads (lampwork) and various bone beads.  I dropped the beads on the bead board and let them fall where they may, then strung them. 

Most of the time I am very symmetrical in my designs, making each side of the necklace match, left and right of the focal piece in the center, whether it be a bead, a carved bone pendant or a fused glass pendant I created, but occasionally I get a little wild and just drop the beads and string them.  (My husband likes it when I do.  The necklace in the pic is one of his favorite pieces.)

Maybe you purchased some semi-precious gemstone beads or just some glass beads, and you have been looking at these beads in your bead box for quite some time trying to figure, what am I going to make with them.  How do you take them from just being a pile of beads, just sitting around the art studio, to finished jewelry?  I will do some layout on my bead board and shoot some pics and post them to give you a concept of how I get creative, whether symmetrical or abstract, how does one come up with a design. 

How do I get ideas for my designs, you ask?  I look at the seasonal color charts that are published and I look at clothing magazines and jewelry design magazines.  I get ideas from various places, nature, leaves, flowers.  I never copy anyone’s work.  All my pieces are my originals, but I can look at someone work and get a basic idea and then create my own unique piece from there.

If you have any questions, please post them.  I will try my best to answer them.

Christina


To follow my blog, click on the purple diamond on the right hand side of the screen below the links section.——>

Posted on Leave a comment

Holiday Greetings

Hello everyone.  I trust you had a wonderful holiday season.  My family and I had a fantastic Christmas!!!  Haven’t done much jewelry making the last few weeks, and have not posted to the blog.  With the closing of my art gallery, getting ready to leave for vacation and being gone, there was not much time to make jewelry.  I just posted a couple of pendants to my Etsy Shop. So for today’s blog I will show you those.

This Necklace has a carved bone pendant, 2 of my handmade (lampwork) beads, and copper beads, strung on a Sterling Silver Chain.  To see more pics and find out more info click here:
http://www.etsy.com/listing/65488100/carved-bone-pendant-copper-beads-on

Blue and Red Pendant is fused glass with 4 of my handmade (lampwork) beads strung on red rubber cord.  To see more pics and find out more info click here:
http://www.etsy.com/listing/65487462/blue-red-fused-glass-pendant?ref=v1_other_2

Coming soon, I will post a blog on making fusing glass pendants.  I will also be entering some pieces in the Manatee County Fair and will keep everyone apprised on that project.


Wishing a very prosperous New Year to everyone.
Christina

Posted on Leave a comment

After Annealing The Beads/Design

Once the beads are annealed in the kiln (see my previous posts) they are ready to incorporate into jewelry.  Thus begins the process of design.  I am constantly seeing design all around me.  I take pictures with my cell phone, or on my camera.  I grab a pen and paper and sketch out a design.  Sometimes a design comes from something I see someone else wear.  Maybe on a TV show or walking down the street.  Sometimes I find a picture in a magazine I clip out.  Sometimes designs just pop into my head, from trees or nature.  I have even dreamed designs.

I take all the sketches, photos and magazine pics that I collect, and scan them into my computer.  I save them in pdf format.  I place all ideas in a folder I call ‘sketch pad ideas.’  Then I break them down into two categories.  The first is ‘Others Ideas’ the second is ‘My Ideas’.  I sign and date all my original sketches and write notes on the sketch.  Others ideas I do not sign, but still date them and write notes on them.  That way when I start looking for ideas I will remember when and where I saw the idea.  I never steal someone’s design, but I use others ideas as a launching pad to stimulate my mind.  The collection of sketch pad ideas are just that, ideas.  A place to start.  I look at someone’s piece of jewelry and think, how can I change that and make it my own unique piece of jewelry.

Example:


The drawing above was an idea I had for a necklace for a birthday present for my Daughter, Becky in December 2005.  It was drawn on my computer in Paint program.  Since then I have a computer program called Bamboo.  (My Son’s family gave me Bamboo for Christmas in 2008.)  It is a drawing tablet that looks like a mouse pad, and the mouse looks like a fat ink pen.  You draw with the mouse/pen on the tablet just like on a sketch pad, which draws right on the computer screen.  I love the Bamboo sketch pad.

This necklace was designed around the small Topaz gems.  I purchased them then had to design a necklace that would fit the small Topaz without overpowering them.  Thus the making of the very small clear glass beads.

Below is the finished necklace which has 6 of my handmade beads.  They are small, clear, wrapped in dichrioc glass and it has 5 Mystic Topaz gems, with a Sterling Silver clasp.  Topaz is the Nov birthstone, my daughter’s birthstone.


The closeup shows the small hand made beads.  They are about 5 millimeters, and the Mystic Topaz are about 8 millimeters.  I hope this blog post gets your design juices to start flowing or at least gives you some insight into my mind and how I come up with a design for a piece of jewelry.  Christina

Posted on Leave a comment

Making Glass Beads, Part 2

After I make the beads, I put them in my kiln and fire them.  The process is called annealing.  It strengthens the glass so the bead will not crack and break.  The glass has gone through severe thermal shock in the making of the bead, starting with the glass at room temperature to the very hot flame of the torch, about 2000 degrees, then slowly cooling again back to room temperature.  Annealing them takes the glass up through all the temperature ranges slowly, allowing the glass to slowly acclimate and strengthen.  I hold the kiln at 940 degrees for 30 minutes, which is called soaking, further strengthening beads before slowing cooling the kiln down.  This process takes about 3 1/2 hours.


My kiln is an older model, I have been using it since the 1980’s when I bought it new, but I love it.  I usually spend several days making about 75 to 100 beads.  When I have enough beads to cover the kiln floor, then I anneal them all at once.

In creating a piece of jewelry I will be selling to the public, I want a finished bead that I know will endure.  I don’t want to have a bead crack in half while someone is wearing the jewelry.

Christina

Posted on Leave a comment

Making Glass Beads (Lampwork)


I have so much fun making Glass Beads.  Working with glass is fascinating.  I light a torch, take a solid glass rod, melt it under the torch to a molten, liquid state, then start shaping a bead.  Along the process of creating that bead, I am turning, shaping and decorating the bead.  Then I slowly cool the beads so they don’t crack. The anticipation of getting my hands on that finished bead sometimes is hard, it is hard to wait to see the finished product.  It never ceases to fascinate me as to what I can create with glass.

The photos above are taken by Lin Oakerson.  The first picture is me making glass beads at the Village of the Arts, Manatee Chamber After Hours Event Dec 2008.  The second picture is me showing beads I have just completed to guests in my gallery, Lee Shore Gallery, Village of the Arts, Jan 2010 at the Village Studio Tours Event.