Posted on Leave a comment

Jewelry Photo Shoot

I have been doing jewelry photo shoots.  Lots of new jewelry coming, stay tuned for more info on my upcoming release.  Sign up on my email list for early bird shopping and special offers.
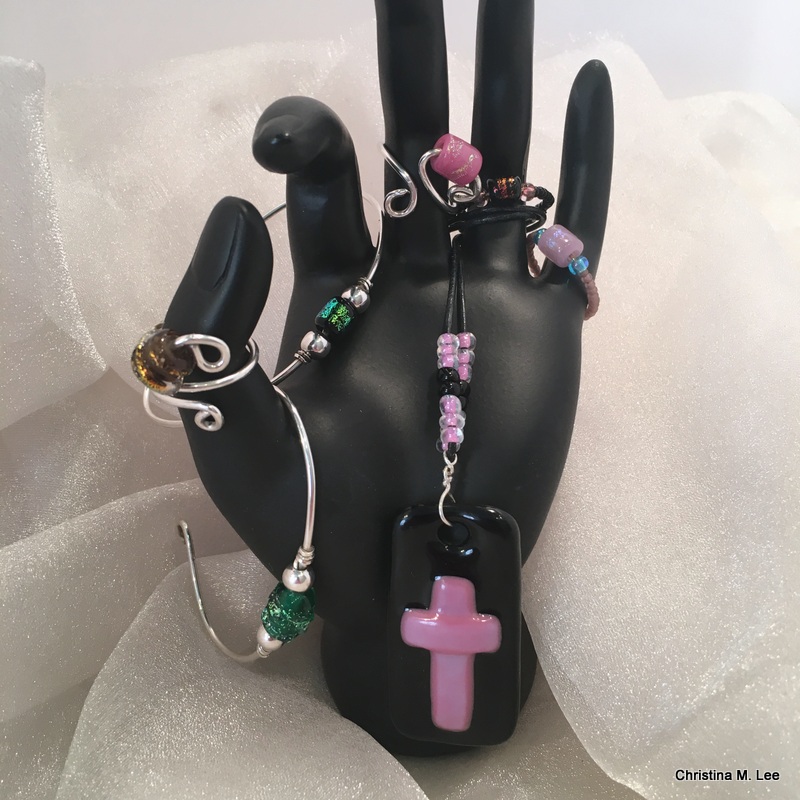
Hand made lampwork beaded jewelry, fused glass jewelry, bracelets, and rings.
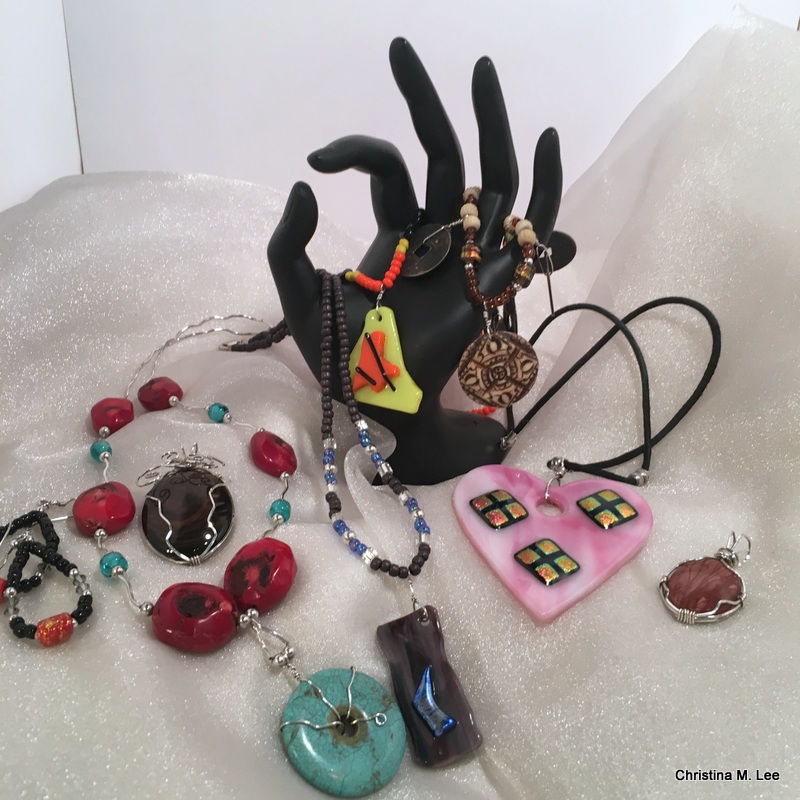
Coral, turquoise, bone, coins, Swarovski crystals, wire wrapped stones and sterling silver.

#christinamlee #christinamleedesigns #leeshorestudio #art #artist #fineart #fineartist #floridaartist #floridaart #floridalife #picoftheday #instalike #instagood #awesome #fiberartist #lampworkbeadartist #fusedglassartist #artstudio #followme #creative #stones #semipreciousstones #turquoise #fusedglass #wirewrapped #wirewrappedstones #coral #coins #earrings #necklaces #fusedglasspendants #bracelets #rings #lampworkbeads #sterlingsilver #swarovski #necklace #pendant

Posted on Leave a comment

Jewelry Care Tips

Here is my Jewelry Care Tip of the day.  This is how I keep my Sterling Silver, 14k Gold, my fused glass and precious metal clay (PMC) pendants, my glass lampwork beads and semi-precious stones looking shiny and pretty.  I use Connoisseurs Jewelry Wipes.  I am not affiliated with the company or the product.  I just use it, and like it.  One wipe can be used over and over and over again for months.  One box will last you for years.  The wipe also puts a protective non-tarnish coat on your sterling silver and protects your jewelry from tarnishing longer.

 Jewelry WipesI just thought I would share with you how easy it is to keep your jewelry looking shiny all the time.  You can buy them at any jewelry counter or on the web.

#jewelry, #jewelrycaretip, #sterlingsilver, #fusedglass, #PMC

Posted on 2 Comments

Creating new Necklaces

Creating new Necklaces for the up coming Art on the Water show

I just thought you might like to see what I am working on.  Here is my work bench and the some of the stuff just finished and some in the process, preparing for this coming Saturday’s show.  (See my previous post for Art on the Water show info.)

Two finished necklaces in the fore ground of the picture.  The cross on the left I did a few weeks ago, the dangle one on the right, I just finished Mon night.  On the bead board is the next one I started laying out last night and stringing.  It will be multi-strand. 

The next step in the process is to price each finished piece and to photograph them.  I so love being creative.  I love making wearable Art, and I hope you enjoy wearing it as much as I enjoy creating it for you. 

I wish I could do this full time.  One day soon I will retire from the paralegal gig and just have fun creating full time.  Have a happy Tuesday everyone.  Do come see me at Art on the Water this Saturday, Jackson’s Bistro, Tampa, Florida.  (See previous blog post or Events page for more info.)

To follow my blog, click on the purple diamond on the right hand side of the screen below the links section.——>

Posted on Leave a comment

Light Defusing Photo Booth

How to make a Light Defusing Photo Booth.

Taking photos of your art work is a whole other art. Good photos will help sell your work, bad photos will turn people away from purchasing your work. Good photos will give you a better chance of being juried into art shows.

Several companies sell photo booths for very expensive prices.  As a beginning artist  purchasing an expensive booth is not an option.  So you can make a simple light defusing booth, rather inexpensively.

A plastic Rubbermaid file box with three desk lamps shining through the plastic (defused light) makes an very good light box for a very reasonable price.  Place one light on each side of the box and one above the box.   You can also place a 4th lamp behind the box if desired.  The file box cost me $10 or $12 at Wal-mart or you can probably find one at an office supply store.  The desk lamps are about $10.00 each.  I have those on my work bench already, because I like lots of light when I work.  Use a hanging file box as it is square.  Other Rubbermaid containers have rounded corners and may not work as well.

I stand the box on it’s end and set it on my work bench and put a piece of gray felt in it and place the piece of jewelry on the felt.  I turn the flash off on the camera.  Glass jewelry will have a reflective glare if not.  If the pic is a bit dark because of no flash, I can always lighten it a bit in the photo program.  (As a note, I use Picasa by Google as photo organizing and editing program.  It is free, just go to google.com and download it.)

Close up of jewelry inside the box.

Finished pic of necklace.

I usually take 8 or 10 pics, then choose the ones I like best.  I take pics of the completed necklace and a close ups of my handmade beads or fused glass focal pieces.

As an added note, a gray background is the best colored background to use.  I have tried other colors.  Black is good, only if you have a piece of artwork that is very brightly colored.  Otherwise black will just absorb your artwork and it will not show up in your photos.  White is to bright of a back ground and will detract from your artwork.  Tan is a second best color, next to gray, but can show up with a orange tent using no flash.  Through trial and error, I have discovered gray is the best background to use and a piece of felt is very inexpensive, and brings out the best of your artwork.

Close up of my handmade beads in the Necklace

Close up of 2 fused glass pendants I made, strung on Sterling Silver wire with my handmade beads and Sterling Silver beads.

Note in all of the above pics the piece of jewelry stands out very clearly on the gray background, no matter what the color, blue, green, red, black purple, gold, or teal.

Hope this article helps you take the best pics of your art work.  If you have questions about photographing your artwork feel free to ask.  Christina